January 2015 ……………………………………………………
This project has taken a bit of a hold since it has snowed… and with the holidays and such. We know that since it is cold out we’ll want to let the concrete set up for at least a couple weeks. So we built the forms, lining them carefully with plastic so that we can easily unmold the insets to embed our tile ornamentation.  We’ve poured a ton of concrete in our lives, but this is a first for us pouring it in the snow.
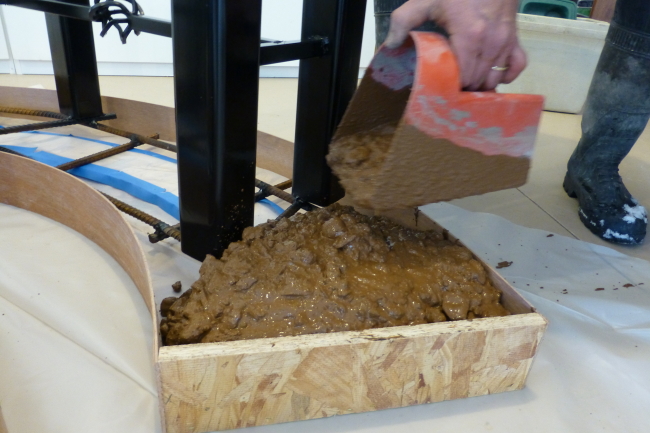 We put some brown die in the mix with the rock, cement, sand, and water, and mixed it in the cement mixer to a wet but stiff mix. Then we wheel barreled it into the shop where the forms awaited. Then we shoveled it in with a scoop.
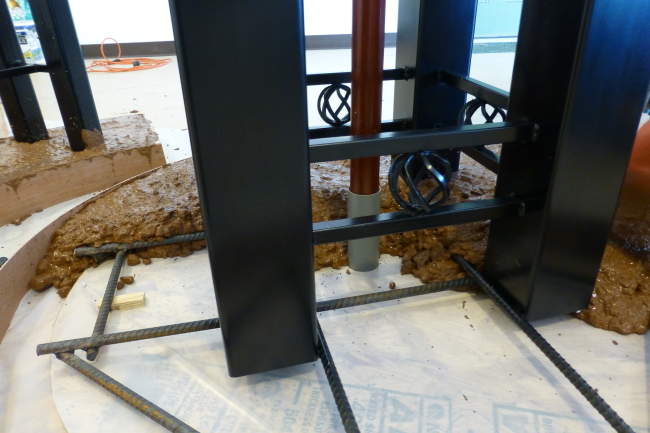
 Now that they are all poured we wait. We’ll let them dry for a couple weeks, then unmold them and ready them for embedding the tile.
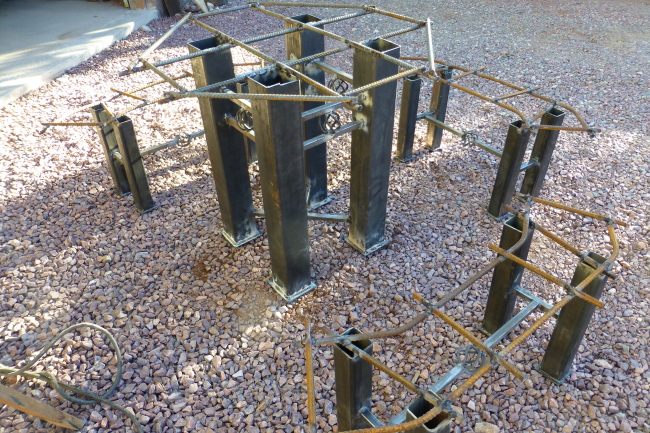
December 2014……………………………………………..  Now that we have the table metal legs and assembly designed, cut, built, assembled, welded, and ground… whew! We have moved on to the benches. We cut the metal legs and the side struts, using the same pre-fab balls in the center that we used in the table (see earlier post, Concrete Table). We’re welding it all together and putting the top re-bar bars across the assembly so that we can sink it into the concrete.
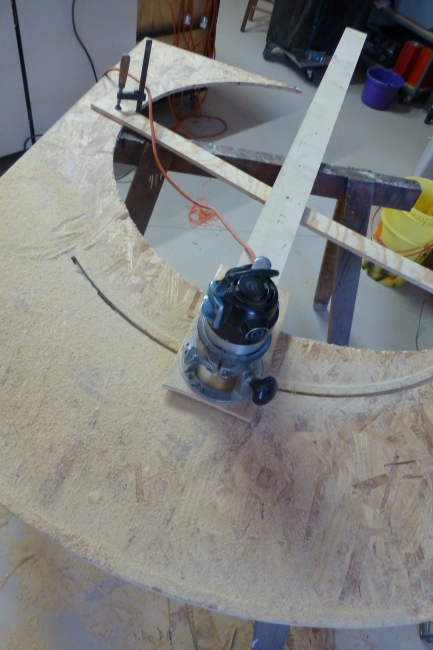 We made the shape for the bench using an elaborate ‘compass’ of sorts with a router, mirroring the radius of the table.
  For the bench form, we are including a recessed band so that we can imbed colorful tiles (we’ll do the same for the table). You gotta have a vision for this sort of project. I love how it’s coming together. The finished product should be very cool. Stay tuned for the next installment. Just as a teaser.. here’s the table and bench skeletons… and the beginnings of the concrete forms. More to come…