Smoke sticks

For Christmas a couple years ago, I got John a miniature wood cask barrel.  For the person that has everything, it seemed like a great way to ‘age’ your favorite spirit to get that rich oaky mellow flavor.  It worked fabulous, and we got several excellent batches of oak aged bourbon from it’s staves.  The bourbon had an amazing smoothness with a toasty finish, and caramelized notes.  We loved it.  Unfortunately, after 4 – 5 times through the barrel, the effect wore off.

So we decided to re-burn the inside of the barrel.  We thought of making a fire inside, but we figured the port hole was too small and the fire wouldn’t be able to get enough oxygen.  So instead we bent over a piece of steel and got it red hot and seared the inside.

poker cask_IR.jpg

We decided for our first trial with the newly smoked barrel, we would ‘smoke age’ some maple syrup.  So poured a bottle of good maple syrup into the barrel and let it age for 5 days.  Then we poured the maple syrup back into it’s original bottle, emptying out the cask as much as possible, then filled it with bourbon and allowed to age for 3 months.

maple syrup cask_IR.jpg

First off… the maple syrup was amazing!  It had a smokey, bourbon flavor.  It was fantastic on french toast… and made the best candied bacon I have ever had.  We used the bacon in scones, breakfast eggs nests, lunch salads and BLT’s.  I hated to see the product go. Yum!  But the maple flavored new smoked bourbon… WOW!  OMG!  You could bottle and sell this stuff.  It is so rich, slightly maple sweet, smooth, and smokey.  Fantastic stuff.


All this got us thinking… a dangerous thing around this house.  Why can’t we just make ‘smoke sticks’?  We could get some good oak… burn marks into them (heck, why not a cool design, or custom names).  Then take the burned smoke sticks and drop them in a bottle of your favorite spirit (bourbon, vodka, tequila, etc.)… or maple syrup.  So we set out to experiment.

smokehands_IR.jpg

smoke etch vert_IR.jpg

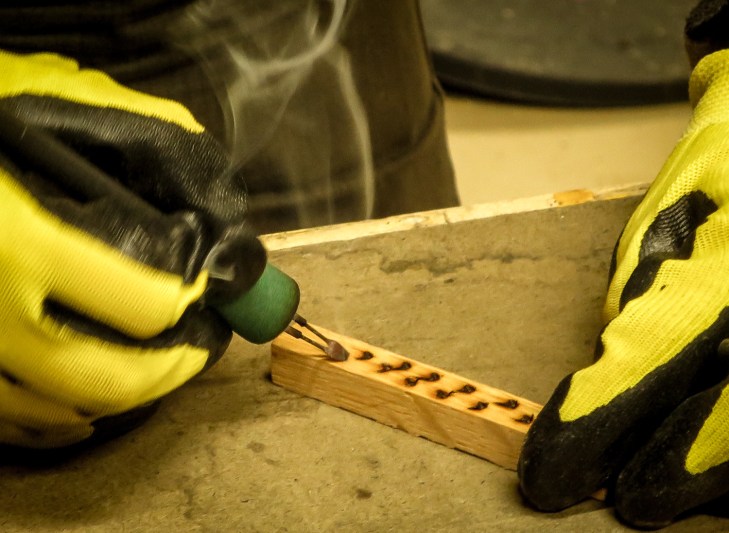
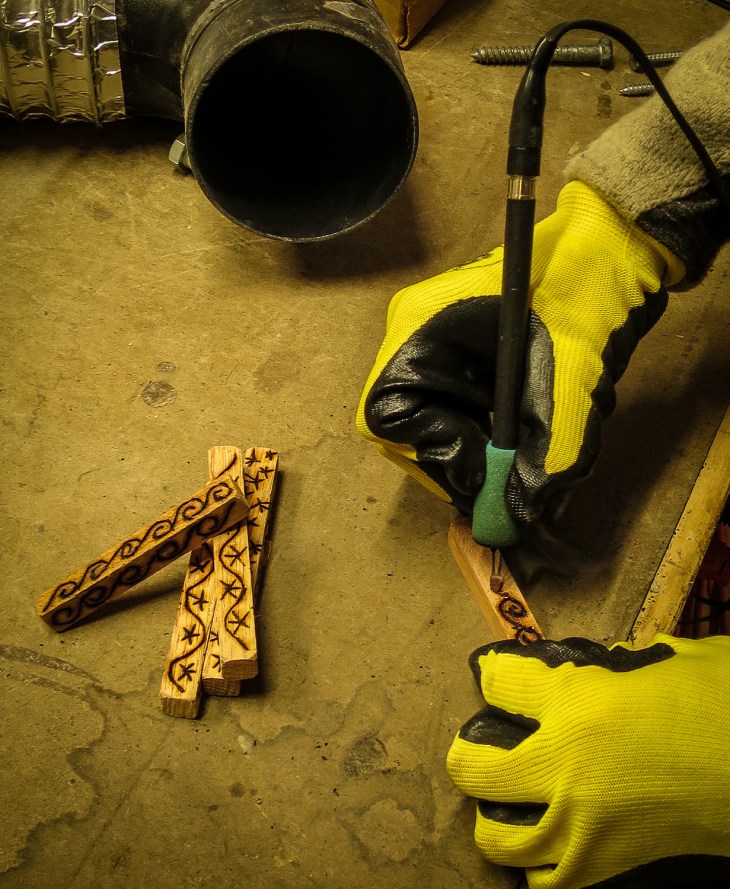
It worked!  To our joy and amazement, the smoke sticks lended a nice mellow smokiness to our spirits.  We started infusing all our spirits with the smoke sticks and winding up with premium spirits out of ordinary brands.  It only takes 3 – 5 days to infuse a nice smokiness… after that it can be overpowering.  They can be used 2 to 3 times… and after that, I’m thinking bourbon infused smoke stick jenga games.

Advertisement

Bird House Condo

What do you think of when you think of retirement?  Relaxing?  Golf?  Travel?   Not having to work!

For me, it is doing exactly what you want to do, when you want to do it.  Not having to report to someone else or appease another for the sake of work.  These days I surround myself with people I want to be around and do the projects, travel, and hobbies that we enjoy doing.

Since retirement, we have worked harder than we did at work… and not pushing paper or on the phone at a desk job.  We have built our home, and large projects which require jack hammers, cement mixers, shovels, picks, and tractors.  The back breaking type of work that yields noticeable large results… but keeps you sore and often hurt.

I have hoped for a day that we can do just this kind of project in retirement… birdhouses!  Simple, small, fun and fulfilling.

We opted to make 3 different size bird houses for a ‘bird house condo’.  We’d make them out of metal… cut them with the plasma cutter and weld them together, then paint them fun colors.  Colorful fun!

layout_IR.jpg
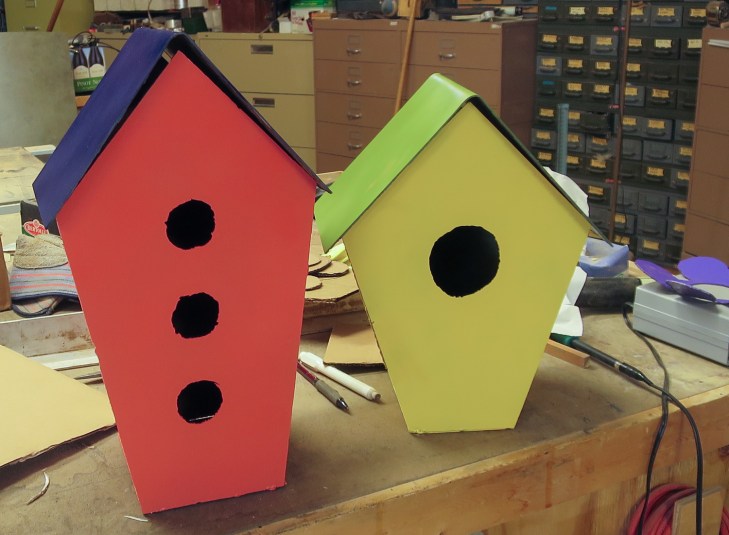
We started with cardboard templates and marked them onto our sheet metal.

plasma cut clos_IR.jpgThen we cut them out with the plasma cutter, along with the accouterments (flowers and hearts).

flwr cut_IR.jpg

Then we set them up..   .corner set_IR.jpg

… and welded them together

weld hous_IR.jpg

welding_IR.jpg

bending roof_IR.jpg

hous_IR.jpgWe hammered out roofs….

Then painted them.  We dug a hole, poured 3 bags of cement and installed a post.

We built a ‘receiver’ and mounted the bird houses on the receiver and installed them in place.  For good measure we put a snow gage below them so we could measure the snow in the winter.

I think they came out pretty good…. we enjoyed designing and building them… and they are fun to look at it.  You know… I think we are finally starting to retire.

color_IR.jpg

bird snowgage_IR.jpg

Fred Flintstone Log Benches

It’s hard to believe we started this project 2 years ago, and are just now getting around to finishing it.  I could tell you that we were letting the wood dry, but the truth is that it has taken us that long for it to come up on the schedule.

After finishing our pizza oven and corn hole area, we wanted to put some benches around the area for ‘spectators’ to sit.  Our neighbor, Pat, (Thanks, Pat) donated a couple trees for our endeavor and so we cut them in half.

Our friend Jim, was visiting from Wisconsin, so we put him to work… back 2 years ago.  Remember that Jim?!

jim chainsawi.JPG

Jim cut our trees in half, as we steadied the logs with our tractor.  With the logs cut in half length wise, we used a hand plainer, angle grinder, and wire brush to burnish the chain saw marks and smooth over the cut surface.


Once that was done, we used the chain saw to cut grooves for a steel banding to tie together the seat part to the back part, then chiseled it out smooth.

backgroovesi.JPG

chiseli.JPG

groovedi.JPG

We cut small logs, cutting wedges into them, to give the log bench something to sit on.

base cuti.JPG

Then we pinned it together and got it ready to move in place.

bench movei.JPG

bench installdi.JPG

Once installed we oiled it to protect the wood and it’s ready for company.