
So, you haven’t heard too much about these concrete tables lately. Perhaps you thought we’d given up on them. Tempting… considering the amount of work they have become, but it’s for that reason that we couldn’t possibly.
If you recall where we left off … we had poured the concrete into the forms (in the snow, I remember well) with the metal bases we had made. We allowed them to dry for some time due to the cold temps. In late January we very awkwardly flipped the (now very heavy) table on it’s feet (with the help of John Deere). We let the tops dry for another couple weeks before attempting to pull off the plastic and plywood insets.
 Forgive the crappy cell phone pic.
Getting the plastic off was easy… but getting the plywood insets would prove to be a pain in the backside. We ended up chiseling it out. In the process we ‘chunked’ out bits of the corners around the inset. So we had to mix up concrete patch (which we had to color, best we could) to match the colored tables and benches.
We put 3 coats on… sanding the concrete between each. (Yes, sanding concrete is as difficult as it sounds.) As a matter of fact, if this project is starting (?) to sounds like a lot of work, well… let’s just say that would be an understatement (and a little insane, yes).
Finally… we individually cut our tiles for our insert. We mixed up some thin set, and began the daunting task of laying the tiles, and then with a toothpick removing the thin set from between the tiles.

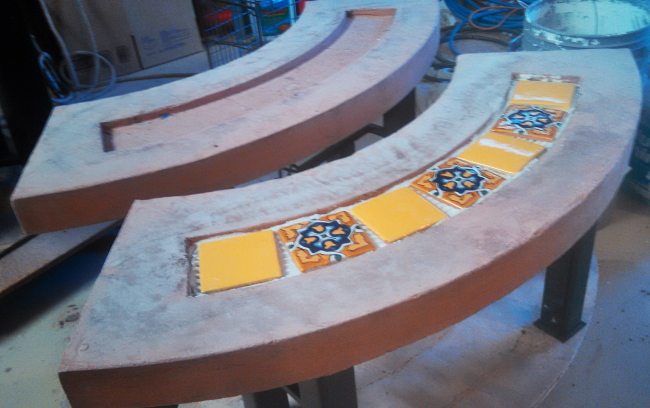
Whew! Almost done.

We still have yet to grout in between the tile… and waterproof with Thompsons.
Oh, and there’s the bit about prepping the whole area they go in with a retaining wall, sand / rock, leveling, tamping, and laying flagstone. That’ll be awhile.
Maybe next time we’ll buy our concrete tables. They did come out cool… and are the only thing like it out there. Built to last in elegant style.

I can not wait to see these!! They look beutiful.
LikeLike